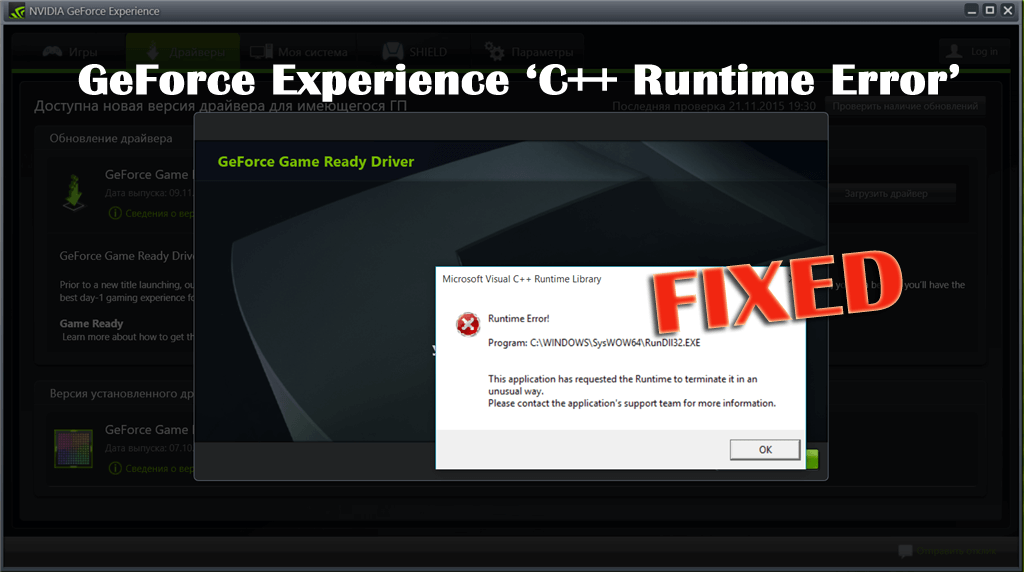
Summary – Dealing with the ‘C++ Runtime Error’ while installing or launching Nvidia GeForce Experience? Wondering what causes GeForce Experience ‘C++ Runtime Error’ & how to fix “C++ Runtime Error”, then keep reading the article.
GeForce Experience ‘C++ Runtime Error’ is very irritating and commonly faced when the users try installing a GeForce Game Ready driver using the GeForce Experience interface.
This is a common error and numerous users are reporting about it on the forum threads. So, below follow the fixes given to resolve C++ Runtime Error.
How Do I Fix GeForce Experience C++ Runtime Error?
Solution 1 – Reboot your System
Many users confirmed that restarting the system works for them to fix C++ Runtime Error with Nvidia Experience.
So, if get the error during the driver update process and the update process is not yet completed then here it is suggested to restart your computer and when the computer reboots open Nvidia Experience > visit Drivers tab > click on Check for Updates and check whether the update is installed properly.

If there is no pending update, then it is clear the installation process was successful. But if the Nvidia Experience is still location a new driver version then clicks on the Download button and repeat the installation process.
Hope the download process gets successful the second time, but if it fails the second time then follow the next solution.
Solution 2 – Run Nvidia Experience with Admin Access
You may get the Nvidia GeForce Experience C++ Runtime Error due to the permission issue which prevents the installer from exchanging some files as it is missing the admin access.
But before running it as admin make sure the Nvidia Experience is completely closed and no background process related to it is running currently.
So, to fix the problem force your operating system to open Nvidia Experience with admin access. This will make sure Nvidia is having the necessary permissions for installing the update.
Follow the steps to run it as admin:
- Right-click on the Nvidia Experience executable or shortcut > and from the context menu,> select Run as Administrator.
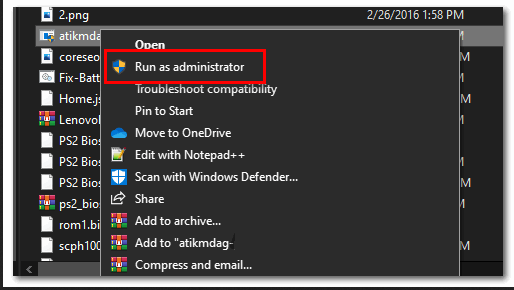
- As prompted by the UAC (User Account Control) menu > click Yes to grant admin access.
Now try installing the update and check if the update process is finished without the C++ Runtime Error in the Nvidia experience. But if the error still persists then try the next solution.
Solution 3 – Disable Nvidia Related Services
If you are still getting Nvidia GeForce Experience C++ Runtime error, then there is a possibility due to the Nvidia related services you are facing the issue.
So, here is it is suggested to disable Nvidia related services before trying to uninstall Nvidia Experience or while eliminating a related program.
Follow the below-given steps:
- Run Windows key + R > and in the Run dialog box > type services.mse > hit Enter to open the Services screen.

Please Note: If the UAC (User Account Control) prompted > then click Yes for granting the admin access.
- And as you are inside the Services screen > head to the right-hand side section > click on the Name icon to get the list in alphabetical order.

- As the list appears > right-click on every service starting with NVIDIA > and from the appeared menu > select Stop.

- Make sure to repeat the steps given until every Nvidia service is disabled.
Once all the services are disabled, you can repeat the uninstallation process that was causing the Nvidia Experience C++ Runtime Error.
However, if the error is still not fixed, then head to the next solution.
Solution 4 – Manually Install the Update
If Nvidia Experience is still unable to update the driver version automatically then here it is suggested to update the driver manually. As this may works for you to solve C++ Runtime Error in Nvidia Experience
Many users confirmed installing the Nvidia update manually to the latest version works for them. Well, the manual process won’t depend on Nvidia Experience for fetching the required files and download them locally.
So, follow the steps given to install the update manually from the Nvidia official website:
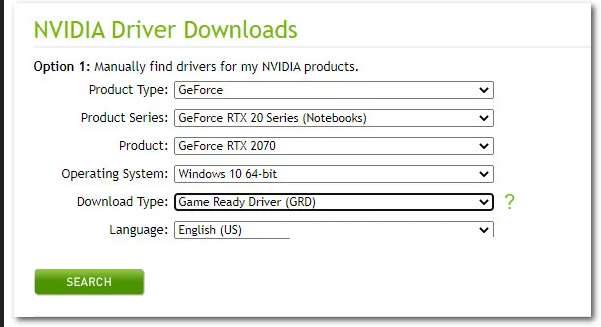
- First, open your default browser > visit the Download Drivers page of Nvidia.
- And as the page opens > set the correct Product Type, Product Series, Product, Operating System > and under Download type > select Game Ready Driver.
- Lastly, select your language > click on Search to find the appropriate driver version.
- As the correct driver is identified > click on the Download button and wait for the downloading process to complete.
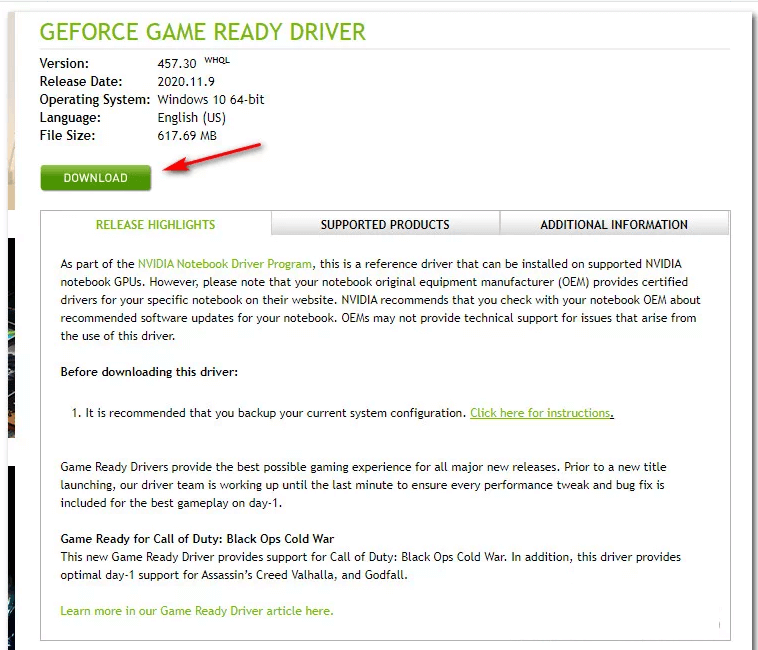
Please Note: If in case you get redirected to a different page > then click Download again for starting the installation process.
- And as the download process is complete > double-click the installation executable > click Yes at the UAC (User Account Control) for granting admin access and follow the on-screen instruction for completing the installation of the pending driver.
- Well, if the installation is completed successfully without showing the C++ Runtime error then restart your computer
But if the error still persists then head to the next solution. Moreover, you can also update the Nvidia Gefore driver by running the automatic driver update tool.
Get Driver Easy to update Nvidia Driver automatically
Solution 5 – Reinstall Nvidia Experience
If none of the above-given fixes works for you to fix the GeForce Experience C++ Runtime error, then here it is suggested to uninstall and then reinstall the Nvidia experience with every Nvidia component and associated necessity.
Follow the steps given below:
- Press Windows key + R > and in Run box > type appwiz.cpl > hit Enter to open up the Programs and Features screen.
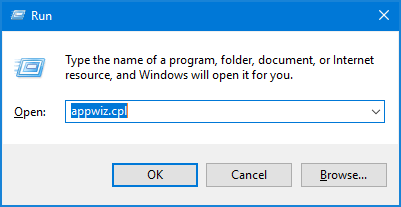
Please Note – If prompted by the UAC (User Account Control) > then click Yes to grant admin permission
- And as you are in the Programs and Features window > clicking on the Publisher column to sort every installed up through their Publisher.
- As you order the applications properly > right-click on the first item published by Nvidia Corporation > and from the context menu select Uninstall.

- Then repeat the process with every item published by Nvidia Corporation from this list.
- Next, follow the uninstallation process till you are able to remove every component published by Nvidia Corporation. Make sure to remove each and every component and dependency related to Nvidia.
- And as the uninstallation process is completed > restart your computer and wait for the next startup to complete.
- As the computer restart > visit the download page of Nvidia Experience and download the latest Nvidia version available.
- Make sure to follow the on-screen instructions for completing the installation of the latest Nvidia Experience version.
- And as the GeForce Experience application is reinstalled > start the application and go to the Drivers tab > click Check for Updates next install every pending driver update you are prompted for.

So, these are the fixes that you need to try to fix the GeForce Nvidia Experience C++ Runtime error.
Why I am Getting a C++ Runtime Error?
Well, there are many different reasons responsible for the GeForce Experience C++ Runtime error. Below have a look at some of them:
- Due to the installation glitches or the installation of Nvidia driver was not completed successfully
- The conflict of the Nvidia service can also cause the error.
- If the Nvidia experience is not having admin access.
- In some cases the unending issue with the update feature
- Due to the system file corruption while installing Nvidia Experience.
Best & Easy Way to Speed up Your Windows 10 PC/Laptop
If your Windows 10 PC or laptop is running slow or showing various errors and issues then here it is suggested to scan your system with the PC Repair Tool.
This is a multifunctional tool that just by scanning once detect and fix various computers errors, remove malware, hardware failure, prevent file loss, and repair the corrupted system files to speed up Windows PC performance.
Not only this, but you can also fix other PC fatal errors like BSOD errors, DLL errors, repair registry entries, runtime errors, application errors, and many others. You just need to download and install the tool, rest work is done automatically.
